![]()
![]()
Tutorial Page 6
![]()
Launch the Phase Response Curve module by clicking the
Experiments->Phase Response Curve->Varying Time of Perturbationmenu item. This will produce a dialogue box asking you to select parameters and environment files and enter an name for your simulation. As before just enter a name and click "Next". Again we'll ignore the form which appears for now. Just click "Next" again.That should bring up this form.
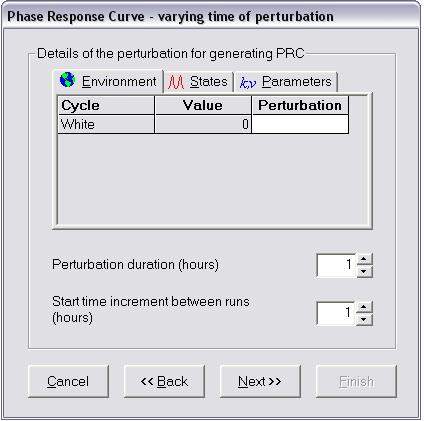
Here you are asked to define the perturbation that will be used to produce the phase changes. This can be a perturbation to any of the model parameters, states, or the light-dark cycle. We'll keep it simple and just apply a light pulse. Click the "Environment" tab.
"Value" is the background value light will have during the time period over which the pulse will be applied. "Perturbation" is the value light will have during the pulse. Enter the value "1".
Leave the duration at 1 hour.
The start time increment determines the number of pulses that will be applied and so the resolution of the PRC. Change this to 4 hours so make the simulation run quicker. This means that the pulses will be applied over 1 free running cycle period, every 4 circadian hours.
Click Next to bring up the form below.
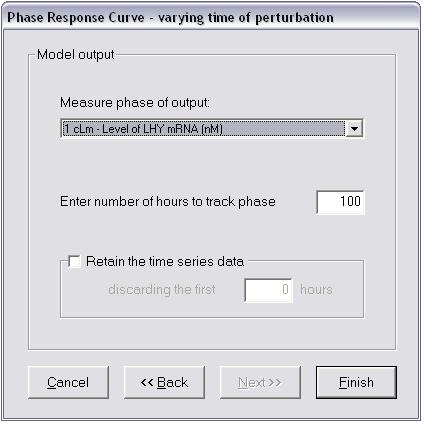
Here you are asked to select a model output that is to be used as a measure of phase from the drop down list. We should not use LHY mRNA as this is a state that is affected directly by light. Change this to "4 cTm Level of TOC1 mRNA".
The "Enter number of hours to track phase" value determines for how long after the pulse the simulation is allowed to move to its new phase before the PRC is generated.
Check the "Retain time series data" box, as this will result in a more complete analysis of the data.
- Thats all the information required. Just click "Finish" to launch the simulation and wait for it to complete.